Grow your business through efficiency.
When a certain event occurs, like meeting a new referral, you can set up an automated workflow associated with this new contact to ensure you and your group are following up with the right actions. Checklist or sequential options. Easy.
Workflow offers you a complete practice management view point and call to action baseline so you can manage projects and advice positions.
Highly effective it covers all the needs of Larger AFSL's and in small Practices - and if you need even more features, it integrates seamlessly with all our modules and because every Practice is different, it’s easy to customise it to your needs linking directly into your Client File Notes:.
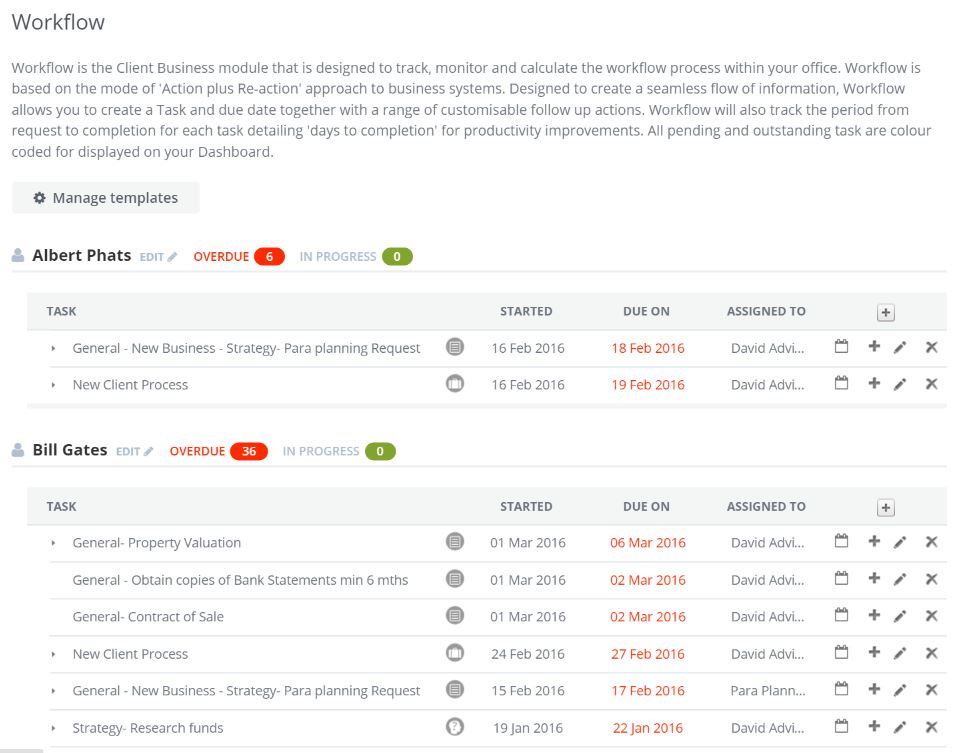
The system offers you the ability to effectively manage the Practice in real-time.
This means you now have the ability to have a high level view of what open and active files are being handled by your staff.
Each Workflow provides you with a detailed position of 'Where Files are at' during pre and post advice position.
How to access Workflow
You can access the status and workflow position from 3 key areas;
- Direct from your Dashboard View
- Direct from your Client file
- Direct from your Staff Action View titled 'Practice Actions' on your Dashboard.
When you first view the High level position of your Practice Action page you will notice that the system defines the
- actions
- roles
- commencement date
- staff member assignment
- link back to client file notes
- key discovery/required actions
- Time monitoring function, colour coded for ease of understanding
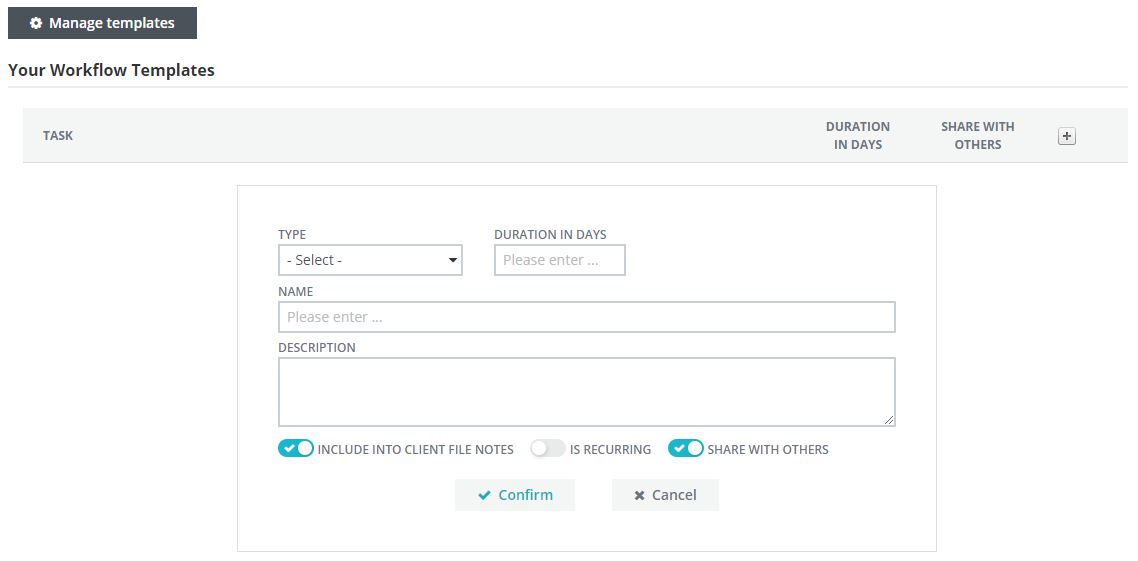
Template Management
The system allows you to build customised templates to suit the task within your office.
For example you may have a set way in which you conduct a 'new client' process. In this case you can design a template to match your office process as easily as writing a note.
Simply go to Managed Templates (this is in grey on the your screen) you will be taken to a screen that offers you the ability to create or edit a template.
Next, click on Managed Templates
Next click on the + symbol and you will see a 'pop-up' screen appear
You will see below you have 4 fields to complete
1. Type of Task
2. Duration in days- that is how long this task should take to complete
3. Name of the Task
4. Description- this is to allow a non-engaged staff member understand what is to happen
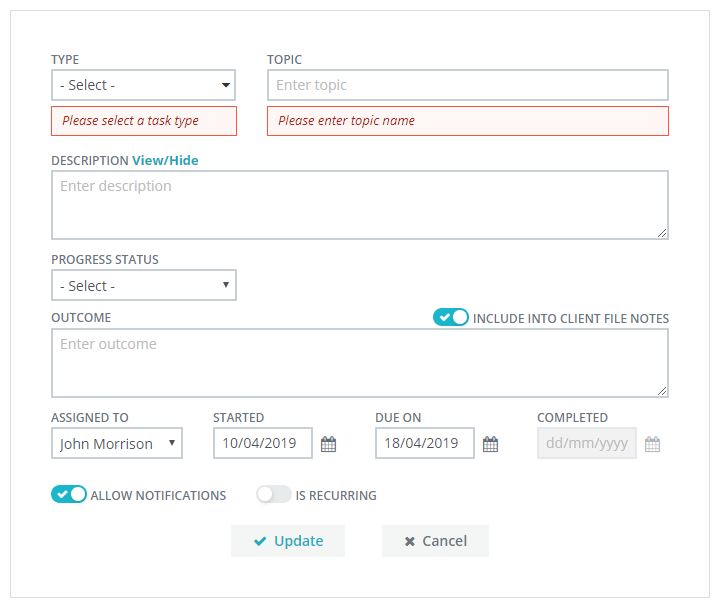
Adding a new Task
The process for adding a new task is straight forward once you have set up your template.
As you can see from the diagram below :
When you select Type you are provided with the following drop down menu

Description
This section is based on what is the overall objective of the task, for this reason it is preferred to provide as much details as possible so as to ensure that the task is fully understood.
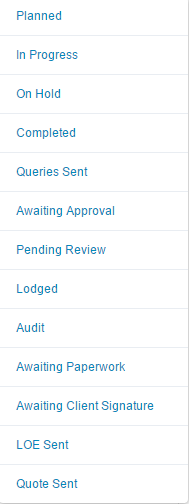
Status up-date
This is a simple 'click' processing option and follows the following
Outcome
This is as the name suggest however, we suggest that you provide as much details as possible as you can elect to have these notes form part of your compliance client file notes.
Assign to
This is the person nominated to complete the task
Date Started, Dated Required and Date Complete
These fields all related to the time duration of the task
Confirm / Cancel
This relates to storing the data or cancelling the request
0 Comments